Report management with i-Reporter

Documents are managed centrally by the system
User authority management and security measures are also thorough
POINT 01
The documents created on-site
Managed by database
You can view reports on the management screen.
Creating reports is easy!
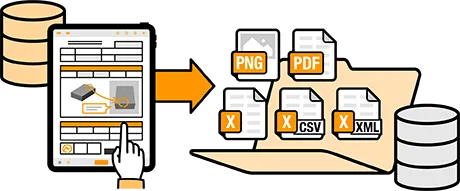
The data of the created reports is centrally managed in the system's database, and you can view, edit, and print reports from the web administration screen.
Form Management
-

template form management
Manages template form created and saved in Designer.
You can edit template form information, such as adding labels, setting detailed permissions, and adding documents. -

Management of input forms
Manage reports created and saved using the i-Reporter app.
You can approve or reject documents submitted using the i-Reporter app. -

Excel/PDF
Output FunctionDocuments created and saved with the i-Reporter app can be output as reports in Excel or PDF format.
-

Input form
Batch output functioni-Reports created with the i-Reporter app can be output in CSV, PDF, or Excel format all at once.
-

Master Management
You can manage, update, and delete master data (e.g. product number master, customer master, etc.).
-

Email notification function
You can be notified by email when a report created with the i-Reporter app is saved.
Unified management of document data
It centralizes the management of business forms that have been managed on paper, and improves the efficiency of on-site document operations.
template formReport reference and editingData outputAutomatic report creationLabel managementDocument managementSchedule managementsystem management

Label-based document management
Labels that can be set as parent and child allow users to easily classify and manage documents, etc.
Only labels that the logged-in user has permission to view are displayed in Manager, Designer, and all apps.
-
For definitions, reports and documentation
Set the label for each -
The label saysName freely
AttachYou can -
Between the labelsParent-child relationships of
Can be set -
One template form and report
Unlimited labels available

Search and sort documents
From ConMas Manager or any app
You can easily search for the desired report from the large number of reports in the database.
-
Searching, filtering and sorting possible
-
In-app search and filtering input
In the window Barcodes and QR codes
Search by reading is possible -
From the label selected during search
The reports included under the lower level labels are also
Search forTo

Form input data
CSV, PDF, Excel batch output
Collect input data from multiple forms created from a single template form
By outputting to CSV, PDF, or Excel, you can easily compile and analyze the data using Excel, etc.
-
Multiple output template form can be specified
-
Created from the specified template form
Select the report to be output from the report list,
For each template formWhich field?
Setting whether to output is also possible -
Input image file,
PDF file of the report
Simultaneous output is also possible

Schedule management function
Schedule Manager
Administrators can create on-site work schedules and send instructions to devices.
From the ConMas Manager user task registration calendar screen
Administrators can create schedules that define who will do what, when, and with which forms.

Edit history management for each input item
Every time the input value of the form is updated, the input value information is acquired as history,
You can check the entire history of input values for each input item.
* Input history is saved on the server. History is not saved locally on the iPad or iPhone.
* There is no limit to the number of input histories.
*You can set whether or not to obtain history for each template form (this can also be set for the entire system)

Enter the reason for changing the cluster value
When changing a cluster value that has already been saved on the server, you can enter the reason for the change each time.
-
If you do not enter a reason for the change
Cluster value cannot be changed -
This setting is done for each template form in Designer.
Or, do it in the Manager for each template form or report

PDF trail output
When outputting a PDF document, it is possible to automatically output a "Revision History" page as a PDF trail.

POINT 02
No worries for business use
User and authority management,
Supports security measures!

It realizes the approval management required for business systems and detailed authority and role management for each document. It also provides thorough security measures against information leaks, such as user management, password management, and individual iPad authentication management.
Authority management and security measures
-

User Management
Add and edit users.
Users can set deadlines, register stamp impressions, belong to certain groups, etc. -

Group Management
Groups can have permissions set.
To set user permissions, first create a group with the necessary permissions and then assign the user to that group.
Detailed settings are possible, such as access on the Manager, template form, input reports, and by cluster. -

Device Management
To connect from the Designer and i-Reporter apps, you need to log in with your account and approve the device you will be using.
A request is made from the terminal, and data can be exchanged once the administrator approves it on the Manager.
User authentication
When accessing the ConMas Server, user authentication is required by entering a login ID and password.
-
ConMas Manager(browser)
User authentication -
Designer(Windows Client)
User authentication -
When entering your login ID in the app
Barcodes and QR codes can be used

Password strength settings
When a user sets a password, the strength of the password is checked according to the setting.
If the strength is insufficient, the setting will not be completed.
Check items that can be set (multiple selections possible)
-

English capital letters
Include lowercase English charactersThe password must contain both uppercase letters (A-Z) and lowercase letters (a-z).
-

Include numbers
The password must contain numbers (0-9).
-

Include symbols
Password must contain symbols.
-

Password length
The password must be at least the minimum length you set.
-

Same password as last time
Not UsedYou must set a password that is different from the previous password.
-

Password
Set expiration dateOnce it expires, you will need to set a new password.
Device individual authentication management
Access to the ConMas Server is permitted only from devices that have been individually authenticated by the server.
- On the app settings screen, register the "Connection Server", "User ID" and "Password".
- Log in to the server from a pre-authenticated device
- On the app settings screen, go to "Device authentication"Approval submission"
Enter your comments on the application screen and apply. - The app will send the "Device Identifier UUID" and "Applicant Information" generated by the app to the server at the same time.
(The app stores the "Device Identifier UUID" internally.) - Approve the iPad device that has applied for "Device Authentication" from "Device Management" in ConMas Manager.
- ConMas Server will only be accessed from devices with approved terminal identifier UUIDs.
Allow access to ConMas Server
User and authority management
You can set permissions for referencing and editing template form and forms.
-
Individuals (users), authority groups,
Roles (Access Rights)Manage with -
template form and input forms created from them
You can set different settings for each one.